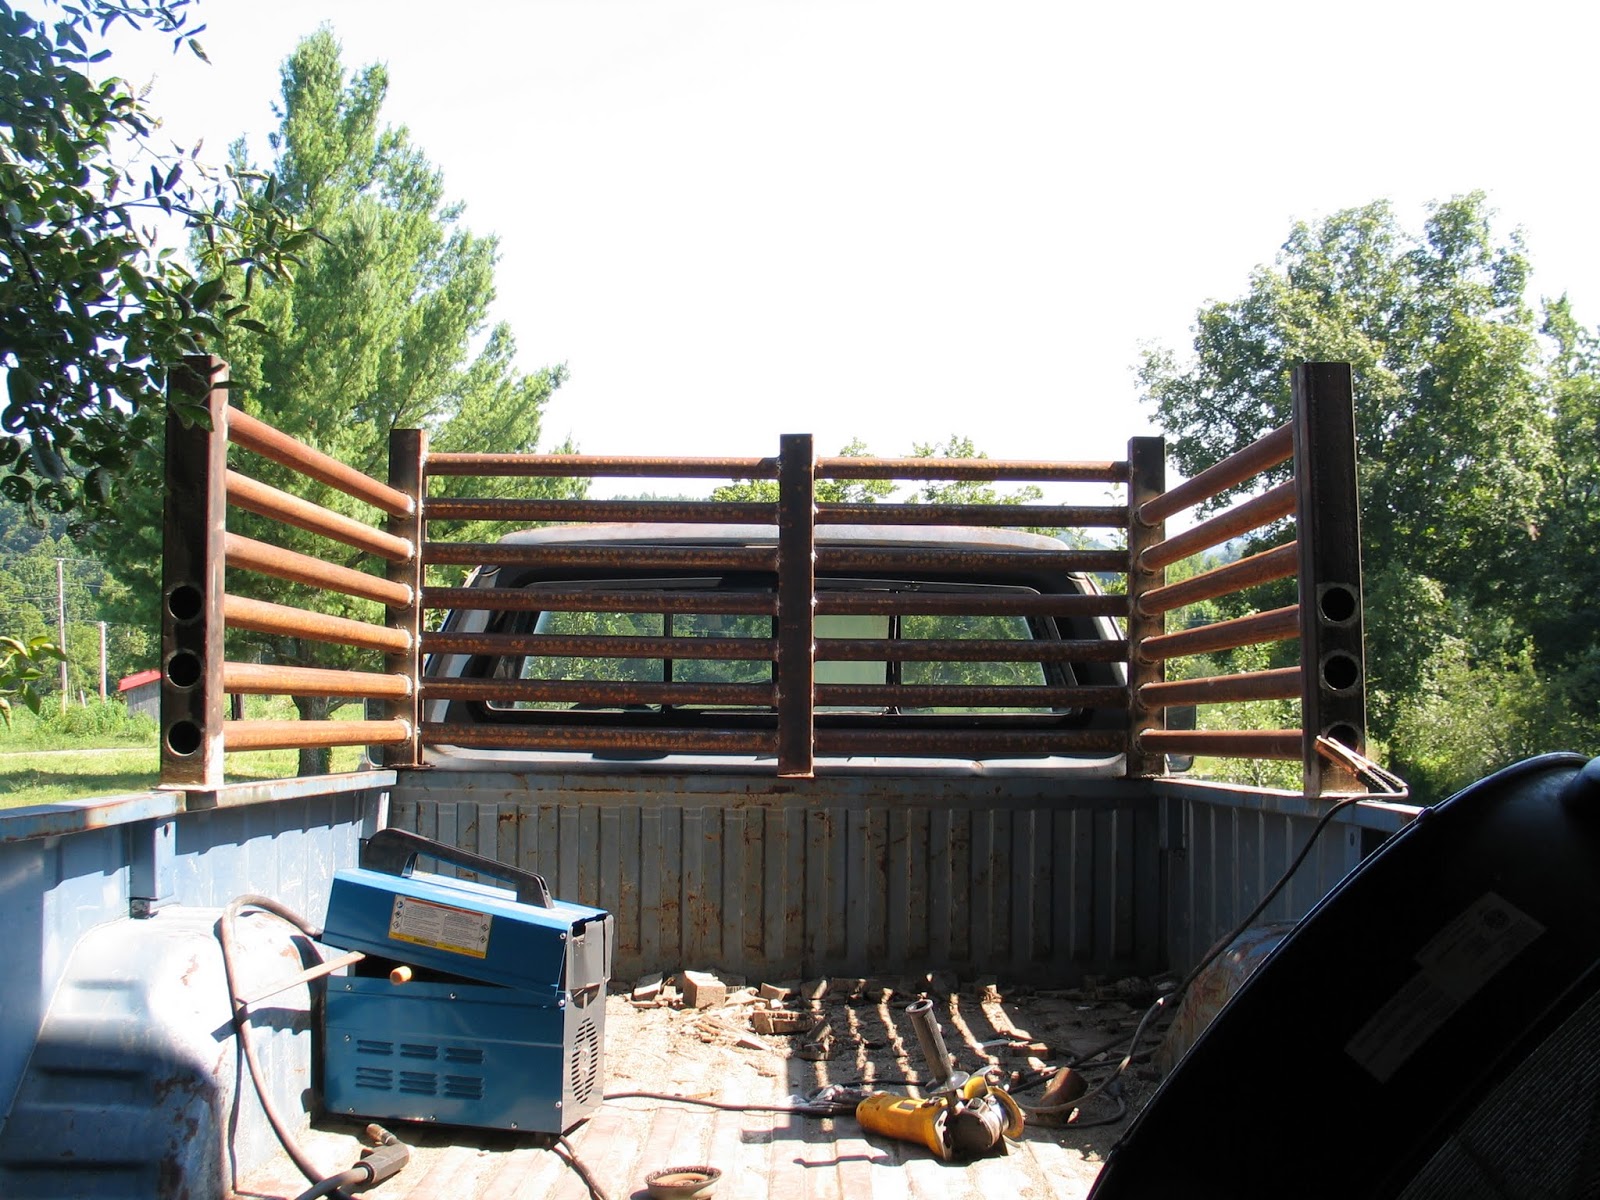
At long last... The rack is finished. I finished the welding, bolted it down and gave it two coats of black paint.
The pictures are satisfying:
Next I will have to connect some of these pieces together, and add a few new ones. Plus I still have no caps for the posts... Gotta work on that.
Thursday, August 4, 2011
Wednesday, August 3, 2011
Gasifier Update
Work on the cooling rack waits for some black paint (I just got some today). So in the meantime, I have lots of little odds and ends to take care of. Here are a few:
The ash has to be cleaned out somewhere. The easiest place is out the bottom; some of the woodgas guys have used ammo boxes extending below the bed, and so I decided to follow suit:
Welding on an ammo box is not easy ; the metal is very thin, and burns right through. So I covered my mistakes with some JB Industro Weld. Good stuff:
I also have to run "plumbing" for this thing. Every device has to be connected in an airtight fashion. So I am a plumber with a welder.... I have been plumbing with the same 20' gate pipe used in the cooling rack:
Here's the cyclone filter with an intake pipe:
Notice the double jointed bend. This is a little smoother, and so the gas should flow easier. It's only one extra weld to make. Same bend on the gas exiting the hearth, and a flange to aid disassembly later:
This long pipe will run to the starting blower. A tee off this line will go into the cyclone. Again, I will attempt to smooth the transition.
I went to Lowe's and bought some pipe caps:
No welding! Just screw them in.
Anyway, I have the paint now, and soon the rack will be back.....in black.
The ash has to be cleaned out somewhere. The easiest place is out the bottom; some of the woodgas guys have used ammo boxes extending below the bed, and so I decided to follow suit:
Welding on an ammo box is not easy ; the metal is very thin, and burns right through. So I covered my mistakes with some JB Industro Weld. Good stuff:
I also have to run "plumbing" for this thing. Every device has to be connected in an airtight fashion. So I am a plumber with a welder.... I have been plumbing with the same 20' gate pipe used in the cooling rack:
Here's the cyclone filter with an intake pipe:
Notice the double jointed bend. This is a little smoother, and so the gas should flow easier. It's only one extra weld to make. Same bend on the gas exiting the hearth, and a flange to aid disassembly later:
This long pipe will run to the starting blower. A tee off this line will go into the cyclone. Again, I will attempt to smooth the transition.
I went to Lowe's and bought some pipe caps:
No welding! Just screw them in.
Anyway, I have the paint now, and soon the rack will be back.....in black.
Monday, August 1, 2011
Cooling Rack - Part Three
Today I got the front left and right sections in. All the remaining pipe is the same length, so I cut 18 pipes, and cleaned the ends for welding. I also cleaned around the holes they go into:
Cleaning the pipes is easiest with a wire brush; I found a rather large one in a barn and have worn it to the nub. It also loves to eat shirt tails, beware!
It took a bit of tweaking to get the pipes where I wanted them; fortunately there's enough play in the system that I can "fudge" little mistakes. Each upright has to be square, level to the truck, accept pipes coming at a slight angle, and still wind up on the edge of the bed. I welded up one side at a time, here's both sides finished:
Now I could easily have finished welding the rack today. Here's a preview of what I have left to add:
But I need to address something else first - the paint. I can't paint the rack in place, I have to move it away from the window. So I'd better do that now while it only weighs 500 lbs. Ughh. I actually don't know what it weighs, maybe I can figure that out. So here is the rack with one coat of Rustoleum Rusty Metal Primer:
Yup, it's rust colored. I will be painting it black soon, don't worry. Again, the front has to be painted before the back is welded on, so that it fits on the truck bed while scooched back. But I like the way it looks now, at least it's not so rusty...just rust colored. A couple more views:
More as it comes!
Cleaning the pipes is easiest with a wire brush; I found a rather large one in a barn and have worn it to the nub. It also loves to eat shirt tails, beware!
It took a bit of tweaking to get the pipes where I wanted them; fortunately there's enough play in the system that I can "fudge" little mistakes. Each upright has to be square, level to the truck, accept pipes coming at a slight angle, and still wind up on the edge of the bed. I welded up one side at a time, here's both sides finished:
Now I could easily have finished welding the rack today. Here's a preview of what I have left to add:
But I need to address something else first - the paint. I can't paint the rack in place, I have to move it away from the window. So I'd better do that now while it only weighs 500 lbs. Ughh. I actually don't know what it weighs, maybe I can figure that out. So here is the rack with one coat of Rustoleum Rusty Metal Primer:
Yup, it's rust colored. I will be painting it black soon, don't worry. Again, the front has to be painted before the back is welded on, so that it fits on the truck bed while scooched back. But I like the way it looks now, at least it's not so rusty...just rust colored. A couple more views:
More as it comes!
Subscribe to:
Posts (Atom)