Monday, April 19, 2010

Today I am painting some of the pieces. This is where it starts to look good.

We begin with the wheels:

Posted Image

Posted Image

Ol' rusty wheels. Looks like I need Rusty Metal Primer, by Rustoleum:

Posted Image

Posted Image

Don't worry, those tires are trash. :lol
On the closer left wheel, you can see I have applied the new paint over the gray primer. Sort of a silver color. Here's all the wheels done:

Posted Image

In the meantime, I was painting the engine black. Here's some of the steps involved:

First, mask all the gasket surfaces.

This is harder than it looks! I used blue painters tape, and trimmed it to fit all the mating surfaces - a painstakingly slow and careful process.

Posted Image

Posted Image

Now paint it! Here's the valve cover finished:

Posted Image

and here's the whole head, intake and cover together (dry fit):

Posted Image

Posted Image

Please notice the metallic lettering on the oil filler cap - that was tricky, but looks good. The shiny stripes on the valve cover were easy - I rubbed off the soft paint along the tops of the ribs.

This Just In: The UPS man and the Post Office have conspired to make my day; I just received my 3TP order AND my gasket set. Exciting!!

Friday, April 9, 2010

Today I started on the interior. I found a piece of berber carpet leftover from carpeting the stairs in our house. It was perfectly sized! so I called on my very talented sister, who does custom seamstress work and tailoring.

Posted Image

Posted Image

Very quickly the scissors were removed from my possession......She did most of the work, and I helped...really I did! I handled the Duct tape...

Posted Image

Anyway, the carpet is so thick I don't think I could fit a pad under it, so I didn't bother with that. Mostly it was cut and tuck, making little pleats to neatly go around obstacles. We got one side finished in three hours. I think it looks very nice, and I bet its the only metro in KY with berber carpet....

Posted Image

This stuff is a pain to cut, you have to cut the heavy backing and then each individual row of "fluff" has to be snipped off - otherwise it will unravel right up the line. Anyone who has installed this stuff knows exactly what I"m talking about.

So I'm pretty pleased, and very grateful....Thank you to our wonderful resident seamstress, who has proven her versatility once again!

EDIT: since I am in here fixing all this, maybe I'll throw in the finished carpet pics:

Posted Image - Posted Image

Redeveloping the Plan


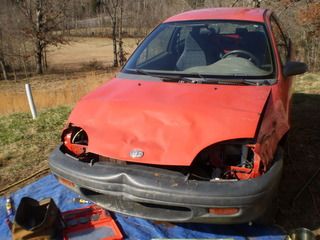
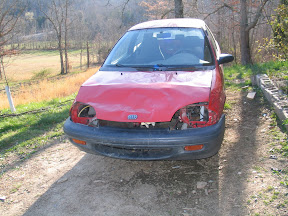
I've decided to take a new direction with my Metro. As you may remember, part of the original idea was to buy a cheap one that needs work, and fix it up for sale at a higher price. The first questions, then are:

1. What can I buy them for

2. What can I sell them for,

3. What does it cost to fix it.

I have yet to find any concrete answers to these questions.

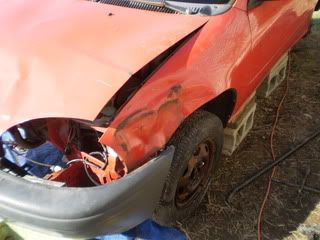
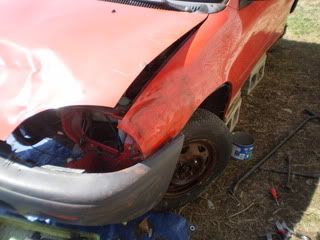
In the first question, I have been monitoring Geo prices for over 4 months. They range from $3000 down to $100 in this area. Now of course that is only the listing price, I have no way to know what they are actually selling for. I paid $200 for one, only to find so many problems that I would gladly have paid $400 to avoid them. But if I hadn't seen that one, then I might have paid $400 for similar problems, and wish I'd bought a better one for $600! The same junker could be sold for $50, $100 $200 or $400 and its hard to tell what's a fair price.

In the second question, I really am lost. First off, how much would a person pay for a fixed up geo metro? It depends on the person, I suppose. And the car, to a lesser extent. I don't think there is an established price, except for basic transport, which is 1000 to 1500. There may not be a market above this level. On the other hand, at least a quarter of the metros I see are priced around 2000 or higher, as high as 3500. So what makes these cars different? Maybe the owners are dreaming. Maybe the cars really are “better” in some sense. They certainly are clean, with no obvious problems. So is that worth $1000? I don't know.

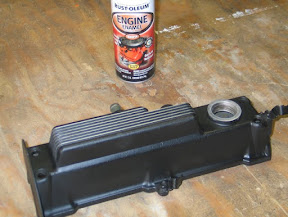
The third question is relatively easy to answer. The parts are readily available, and you simply total up what needs replacing and weigh that against the cost of the car. Then you know if its worth purchasing. But that calculation depends on the answers to the other two – like this: I see a car for $200. I can fix the car (I think) for $800 in parts and 30 hrs of labor, at $35/hr, about $1000, so I need then to sell for $2000. But if I can't sell it for $2000, I can't make that one work. How do you find out the absolute sale price without risking a lot of investment? I don't know. I suspect there is not a market for “fixed up” Geos, only for cheap ones that still run. The “nice” metros are few and far between, and those who appreciate them are mostly already members of the GMF.

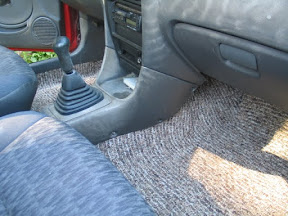
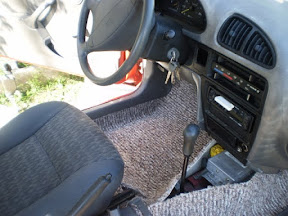
So, as I said I am changing direction: I am going to keep the metro, because I do appreciate all the finer points, and I can just fix the parts that I care about. I may put carpet in it, but I am much more anxious to get it drivable first. This takes out the guesswork of knowing what I should fix and to what degree – I don't really know what “most people” value in a car, but I know what I want.

I am selling my Volvo 240 wagon, to clear the decks and free up some cash. The metro will be my only car, and I hope it does me well. Of course, I have the use of other vehicles, but this one is mine, and I will use it as such.

Sunday, April 4, 2010

Ive been welding......plastic welding, that is. The bumper had some cracks in it, and big scratches.
I forgot to get a 'before' picture, this is a really bad close up from another pic. The crack is about 2" to the left of the visible screwhead.

Posted Image

The material seems to melt pretty easily, so I heated it with a blowtorch, until it was liquid on the surface. I cut "filler rods" from the back side, with a pocketknife. Then I melted it into place. It took about three tries before I was happy with it. I had to be gentle with the plastic so as not to burn it. I re-textured it by patting with a dry cloth while still soft. Then I blended the new areas in with fine sandpaper.
The end result:

Posted Image

Not perfect, but much better. It is really hard to do a cosmetically perfect job without the benefit of a plastic mold. Also the color is a bit lighter than the rest, but I may paint the whole thing anyway.

Thursday, April 1, 2010

Today, I am in the process of straightening the bumper.

Posted Image

As you can see, there is a large dent right in the center. I noticed this morning that it was more pliable than it had been due to the temperature going up. So I consulted with some experts on the matter, who advised that I make a form of wood, to hold the desired shape, while I applied heat. I couldnt think of a gentle enough heat source, as I only really have a propane blowtorch, or maybe a hairdryer. Then I realized the easiest way, right in front of me:

Posted Image

Solar power to the rescue! I once checked the temp in there at something like 115 F with the doors closed on a hot day. I closed the doors, let the heat built up (briefly!) and the plastic was soft like a rubber tire. I proceeded with the form, clamping it tightly.

Posted Image

Posted Image

The bumper is now shaped almost perfectly. Thank you to the experts who encouraged me in this regard! Thats what makes this place so great.

Reinstalled, looks like this:

Posted Image

Posted Image
Here we go: some pictures previously posted elsewhere, moved here for my own records.
Radiator (damaged)
Posted Image
Hatch dented
Posted Image
fender dented
Posted Image
hood damage
Posted Image
Rad. Support core
Posted Image
under hood
Posted Image


So there you go.


Edit: Bogs suggested a method of straightening a fender that works particularly well - saved me $40 for a new fender.

Before:
Posted Image
After:
Posted Image

Not perfect, but ready for bondo. :thumb

Thanks bogs!